
RESPONSUM allows users to for each sub-module tailor what fields are available. You start off with a default set of fields provided by RESPONSUM, but you can add additional fields, relations and hide existing fields that are not applicable.
See it in action
Pre-requisites to get started
- Permissions as « Power user » (Professional seat)
- Idea around names for the custom fields/relations and what type of fields you want to add in what section
Fast-track to Brilliance
- Open the sub-module you want to edit
- Open any item
- From the « Three dots » menu in the top right, select « Customize sub-module »
- You will enter the « Edit » mode for that sub-module.
Note: All changes made here will be applied to all items of this sub-module - It will show all sections on the left and allow you to add new sections. Clicking any existing field will open it’s properties in a sidepanel on the right.
- If you hover in between existing fields or scroll to the bottom of a section, you will get a « Add field » button, when clicked it will allow you to add a custom field in that location. Once clicked, a new pop-up will open to add the custom field:
- For a custom field you:
- Select « Simple »
- Select a « Unique field name » for the field (Only editable until initial save)
- Select the field type
- Press « Save »
- For a custom relation field you:
- Select « Relation based »
- Select a « Unique field name » for the field (Only editable until initial save)
- Add any labels/translations for the new field
- Select the field type
- Select either an existing relation between sub-modules or use the « + » to create a new relation
- Press « Save »
- For a custom field you:
- Once the field is added, it will be put in the place you selected. However, drag and drop can be used to re-order the field to a different section afterwards.
- Press « Save » on the top right to save your changed sub-module configuration
Step-by-step guidance
Manage sections, fields and their parameters
Each sub-module contains Sections, Sub-sections and fields below each of them. RESPONSUM comes with a set of fields pre-defined for each sub-module, but next to that custom fields and relations can be added and distributed over the sections and sub-sections.
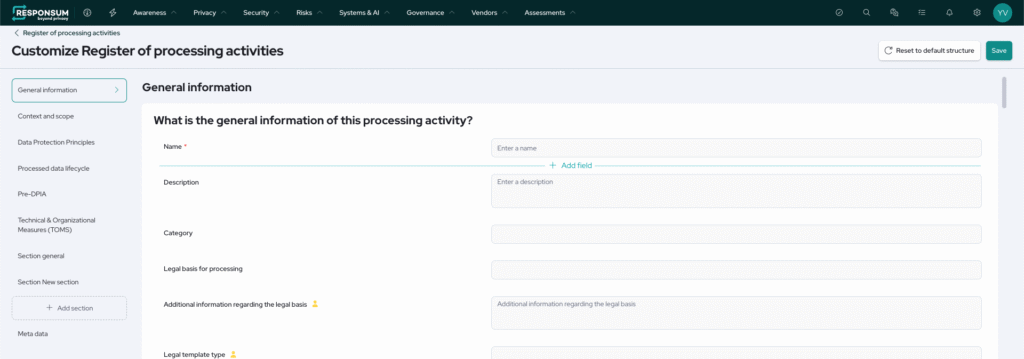
Add a section
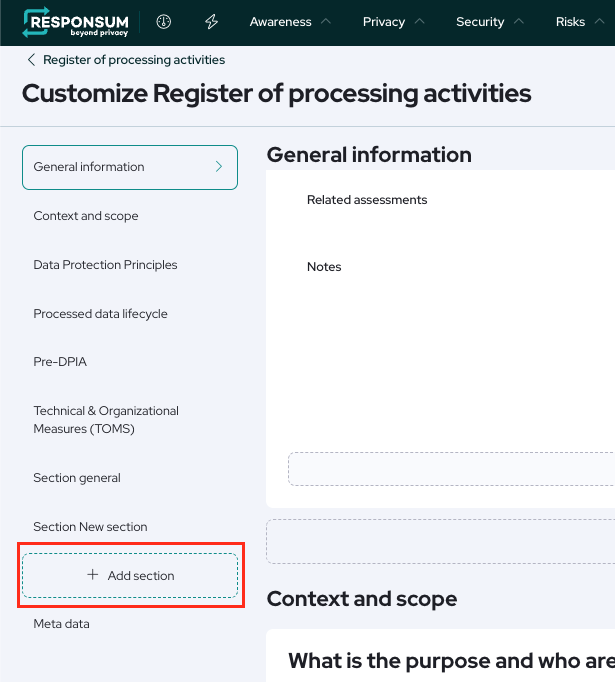
- After going into sub-module customization mode for a specific processing activity, select « Add section » in the left side menu
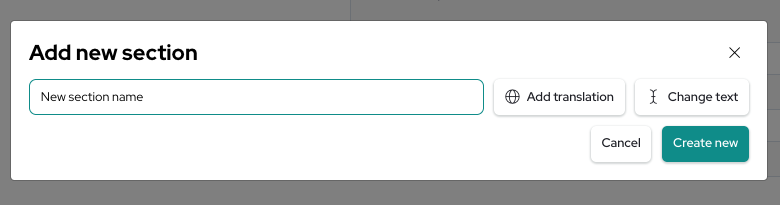
- Give the section a name
- Press « Create new section »
- Sub-sections can now be added to this main section
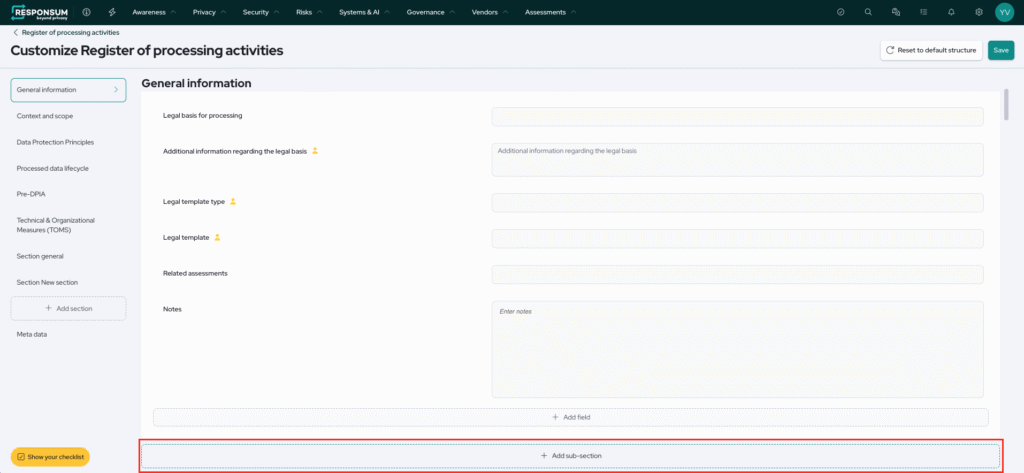
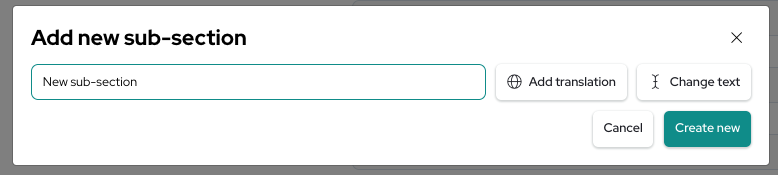
Add a sub-section
- In an existing section, scroll to the bottom of the section and press « Add sub-section »
- Give the sub-section a name
- Press « Create new »
- Fields can now be added in the sub-section
Create a custom field (Simple)
Custom fields can be added to any sub-section available in RESPONSUM. The custom field can be of a few specific types like a file upload field, free text field, dropdown etc.
- Press the « Add field » button in the bottom of the section or by hovering between existing fields if you want to place it in this location.
- A pop-up opens
- Select a « Unique field name for the field (Only settable on create)
- Select the field type based on how you want to use the field
- Save the new field
- Once the field is added, it will be put in the place you selected. However, drag and drop can be used to re-order the field to a different section afterwards.
Create a custom relation (Relation based)
Custom relations allows you to create links between any sub-modules in RESPONSUM. You create a custom field that you link to a custom or system defined (Default) relation
- Press the « Add field » button in the bottom of the section or by hovering between existing fields if you want to place it in this location.
- A pop-up opens
- Select a « Unique field name for the field (Only settable on create)
- Select the link field type based on how you want the relation to be visualised (Dropdown or Card view)
- Select an already existing (system or custom) relation or use the « + » button to create a new relation
- For creating this relation it will ask to fill out a few properties of the new relation:
- A name to easily identify the relation later
- Sub-module 1 will be pre-filled with the sub-module you are adding the custom field to
- Sub-module 2 is the sub-module you want to link to
- Two relation properties can be set in both link directions
- If multiple items can be selected
- If at least one item needs to be selected (Make the relation field required)
- For creating this relation it will ask to fill out a few properties of the new relation:
- Save the new field
- Once the field is added, it will be put in the place you selected. However, drag and drop can be used to re-order the field to a different section afterwards.
Manage and use existing relations (Custom/System)
Relations created by custom fields between sub-modules can be found as part of « My fields ». From here you can find an overview of all system and custom created relations and update their properties. Next to that, existing relations can be re-used to create links in both directions.
Overview of relations between sub-modules
- Navigate to Settings >> My fields
- Press the « Relations » view on top of the page
- Get an overview of all existing relations between sub-modules
- These are either created by the system or created by a user when setting up a custom relation field.
- You can click through on a relation to find it’s details, if it is in use and edit the properties related to the relation.
Using an existing relation in a new custom relation field
In some cases, you created a relation between sub-modules that can only be seen/adapted from within the sub-module you created the custom relation field in. However, you can now reference this same relation to create a custom relation field in another sub-module to create a bi-directional link.
- Navigate to Settings >> My fields
- Select the « sub-modules » tab
- Search for the sub-module you want to also make a prior created relation visible in
- Select « Add custom field »
- Select the « Relation based » tab
- Select a name for the field
- Add any labels/translations for the new field
- Select the link field type based on how you want the relation to be visualised (Dropdown or Card view)
- Select the already existing relation used for the other custom field created earlier
- Save the new field
- Use drag and drop to put the new field under the correct sub-section
When navigating to both sub-modules as part of this relation, you will now find that if the field is updated in one sub-module, it’s updates get displayed in the other.
If you have any questions related this guide or way of working, please reach out to support@responsum.eu for assistance.